
In order to open up Area 0 for the mission, you must clear 4-4E level. Unlike other Areas, there is only 4 missions, and no night or emergency missions.
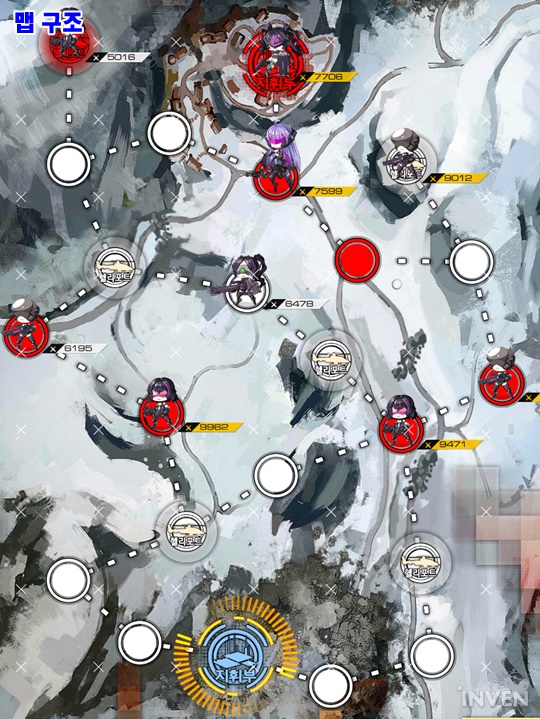
Area 0 is on top of area 1 but in terms of enemy unit strengths it is equivalent to area 6 strength at later missions. 0-4 also introduces 3 boss units in the map with one at 5 million CP… It is best to go around the boss, Which will be covered below.
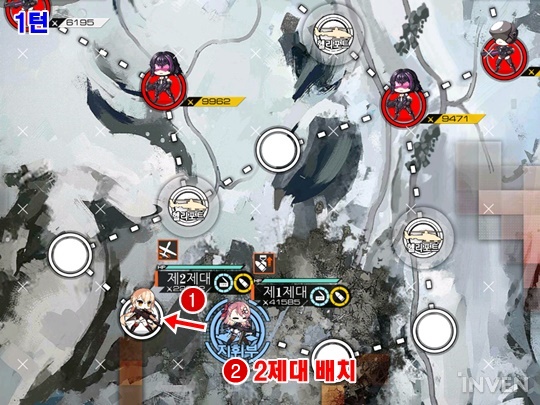
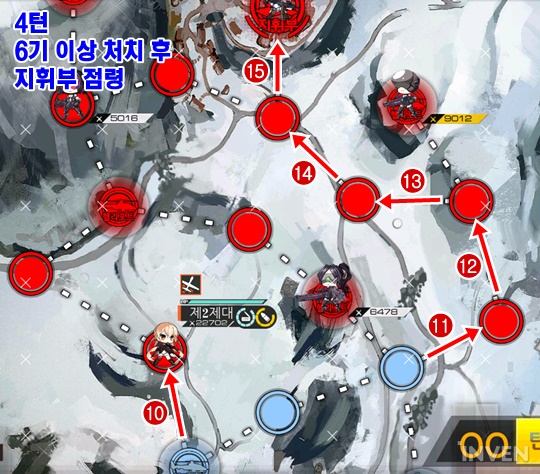
It is important to be flexible in mission due to Girls Frontline does not have fixed enemy movements. So adopt accordingly.I am using pictures with Korean language on them, anything on it will be translated on the bottom of the picture. Red numbers indicates movements. Number on top left of the picture indicated what turn it is in.
I would like to thank Redin at Inven.co.kr with the image. Without it I would have to spend hours capturing new images.
-
0-1
S-Rank condition: Kill 3 unit in 3 turns; control enemy HQ.
Required Squads: 1 (9,000+)


-
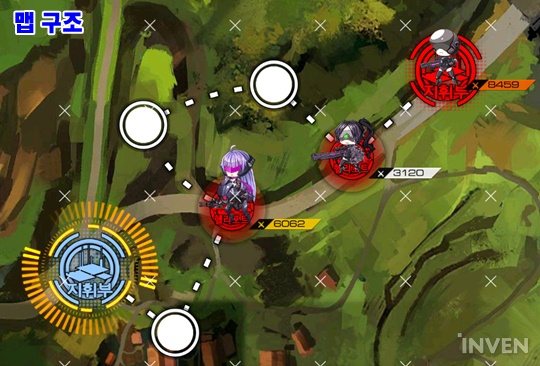
0-2 [Optimal Level grind map]
S-Rank condition: Kill 5 unit in 4 turns; control enemy HQ.
Required Squads: 2 (11,000+ for both recommended) + 2 Friend Echelons

-
0-3
S-Rank condition: Kill 6 unit in 4 turns; control enemy HQ.
Required Squads: 2 (12,000+ for both recommended) + 1 Dummy Echelons
Map View.This map is takes a bit of luck. If enemy unit moves in unlucky direction, it will lock you out of the Gold medal requirement, which is frustrating. Just be patient and follow directions on the map. You will get it soon enough. If you somehow find reliable way to S rank clear this mission 100% of the time, let me know and i will edit this post.


-
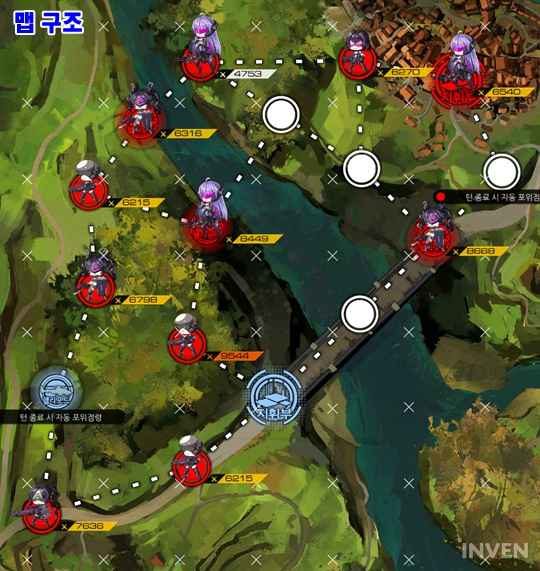
0-4
S-Rank condition: Kill 13 unit in 7 turns; control enemy HQ.
Required Squads: 1 (22,000+) + 2 Dummy + 2 Friend Echelons

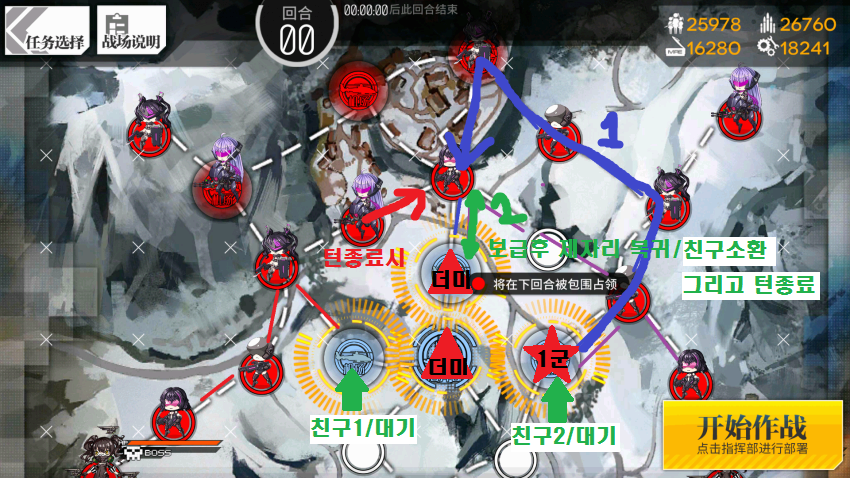
Start: Your Main Echelon spawns in helipad to right of the HQ (red star). 2 dummy Echelon on the HQ and upper helipad on top of HQ (red Triangles).
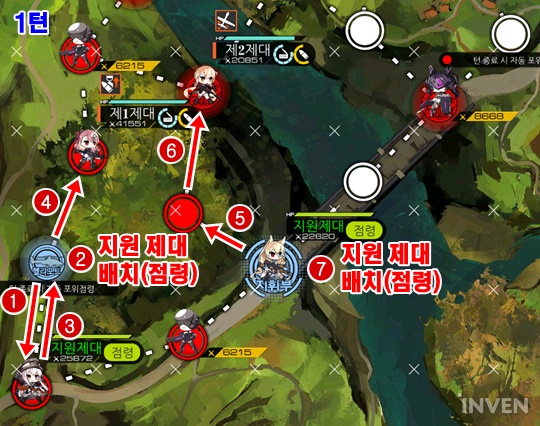
Turn 1: Main Echelon will follow along blue arrow’s path, taking out 5 enemy units. Once it reaches the node on top of the friendly helipad, swap with dummy unit and resupply. Swap it back and enemy unit will run into it during enemy movement phase. Spawn 2 Friend Echelon (2 highest with strongest on the right) on right and left helipad next to HQ. End turn.
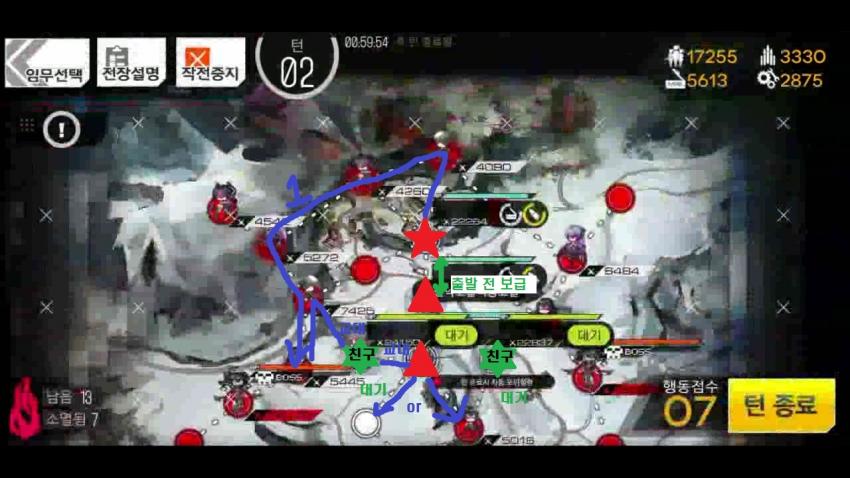

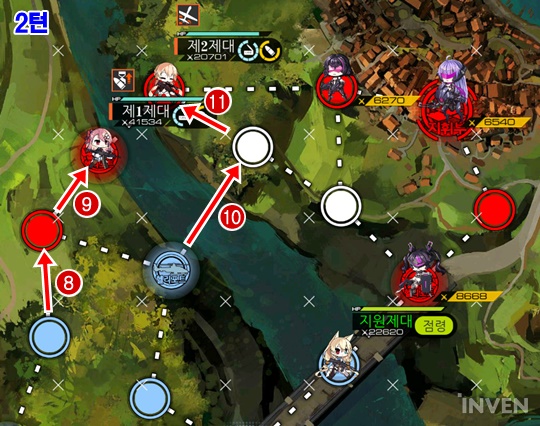
Turn 3: Main Echelon sprints to the bottom of the map, taking down final unit to meet 13 kill requirement. Then park Main Echelon by the helipad on the bottom left. This helipad will not get stepped on by 50k CP boss unit, it will just glare at you and move along towards your HQ.
Back at the HQ, you will be evacuating Dummy Echelons away from the incoming enemy units. Dummy unit from the top helipad from HQ will move 2 down, one node under the friend echelon on the right. Set the setting of Friend Echelon on the right to “eliminate” [this is important]. Next, move your dummy on left of HQ to HQ node.
End turn.

Turn 4: Dummy echelons are going to move up in conga line to the right helipad to swap back Friend Echelon to node on the bottom right of the HQ node. Reference picture above for move order [1~4]. Make sure Friend Echelon is still on “Eliminate” setting before ending turn or your HQ will be taken by the enemy unit and fail the mission.
Also set Friend Echelon on the left setting to “Eliminate” so it takes over a helipad.
